Sunday, December 30, 2018

Cara Cheat Free Fire, Auto Headshot, Anti Report! [Update v1.25.7 Seruntulan Edition]


Cheat merupakan sebuah kumpulan kode perintah atau program yang dibuat untuk  memudahkan player game tersebut untuk memenangkan secara tidak normal. Dan dengan adanya cheat ini juga akan mendapatkan kepuasaan tersendiri dalam memainkan game tersebut.

Tujuan tutorial ini dibuat agar pihak Garena Free Fire dapat segera mungkin memperbaiki bug tersebut.

Free Fire Battlegrounds merupakan salah satu game survival shooter di Android dan iOS. Cara bermainnya yaitu pada setiap ronde akan menempatkan para pemain di pulau terpencil di mana 50 pemain akan diadu, untuk menjadi yang terakhir untuk bertahan hidup. Pemain bebas memilih lokasi memulai saat turun dari pesawat, dan tujuannya hanya satu yaitu bertahan di zona aman selama mungkin.

Dalam game Free Fire ini dapat dimainkan dalam beberapa mode, yaitu mode Solo, mode Duo, dan mode Squad di mana survivor bisa membentuk tim berempat dengan temannya.

Cara cheat menggunakan Game Guardian di Aplikasi Virtual Tanpa Root


Apa saja yang dibutuhkan?

Script Cheat Free Fire v1.25.7  (Winterland Edition)

  • Bypass virtual force close
  • Unlock device banned
  • Remove log, Fix MTP Warning
  • High Damage ++++
  • Super AIMBOT & AIMLOCKK
  • No Recoil All Guns
  • White Enemies
  • Remove Land
  • Speed Run 5x
  • Fast Bullet
  • Antenna 100% Easy find enemy
  • Night Mode
  • Remove Tree
  • Remove Grass
  • Remove Fogg
  • Fast Parachute
  • Color Map
  • No root
  • High Jump 5x
  • 1 Hit Kill Auto Headshot [Seruntulan Edition]
  • Burst Damage All Guns [Seruntulan Edition]
Download aplikasi yang dibutuhkan berikut ini.

Download Script
Catatan: Aktifkan bypass di loading pertama. Jika telat akan force close dan harus ulangi lagi.

Download GameGuardian


  • Anti banned
  • Damage ++, Shotgun bullet damage support, etc
Download Apk Modifikasi
(Note: Uninstall apk original kamu lalu ganti dengan apk modifikasi ini. Pindahkan file OBB ke dalam folderSdcard/Android/Obb/com.dts.freefireth jika tidak ada foldernya silakan dibuat sendiri “com.dts.freefireth)
Silakan coba app virtual di bawah ini salah satu yang cocok untuk Android kamu:

Download Dual Space Lite (Support GG):
  • DualSpace Lite 1.2.7 Mod GG via Google Drive
  • DualSpace Lite 1.3.4 modifikasi via Mediafire
Catatan: Kamu bisa kombinasikan penggunaan script cheat Free Fire.

1. Download tools yang dibutuhkan seperti script Free Fire terbaru, gameguardian, dan aplikasi virtual yang cocok untuk perangkat Android kamu misalnya DualSpace blue/Lite/Parallel Space/Dr.Clone/Virtualxposed.

2. Jika sudah selanjutnya silakan install semua tools-nya. dan clone aplkasi gameguardian serta game Free Fire nya ke aplikasi virtual.

3. Jalankan gameguardian di aplikasi virtual, kemudian jalankan game Free Firenya.

4. Selanjutnya jalankan scriptnya di gameguardian. ikuti petunjuk seperti di awal melakukan bypass terlebih dahulu saat loading awal/pertama.

Untuk cara instalasi dan penggunaannya secara lengkapnya silakan tonton video tutorial berikut ini (jangan di skip, agar tidak gagal paham).

Tambahan:

Silakan install apk Free Fire modifikasi untuk mendapatkan fitur tambahan, seperti anti banned, damage++ dan lain sebagainya.

Review VGA Card NVIDIA GeForce GTX 1050 Ti & GTX 1050

Pada saat munculnya GTX 1080, GTX 1070 dan GTX 1060 berhasil membuktikan bahwa arsitektur GPU NVIDIA  Mampu menawarkan performa kencang dengan konsumsi daya rendah. Bahkan pada saat ini GPU Pascal di notebook, NVIDIA “berani” menggunakan konfigurasi yang sama seperti jenis desktop-nya. Akan tetapi cukup disayangkan, ketiga bagian tersebut memiliki harga yang masih relatif tinggi untuk beberapa kalangan pengguna yaitu di angka US$ 200-US$699.

Melengkapi jajaran graphic card berbasiskan arsitektur GPU Pascal, dua minggu yang lalu NVIDIA secara resmi menghadirkan kartu grafis terbaru mereka yakni GeForce GTX 1050 Series. Menariknya, pada lini GTX 1050 Series ini NVIDIA tak hanya menawarkan satu varian graphic card, melainkan dua varian sekaligus yaitu GeForce GTX 1050 (non-Ti) dan GeForce GTX 1050 Ti, keduanya di bandrol dengan harga jual yang sangat menarik yaitu US$109 untuk GTX 1050 (non-Ti) dan US$139 untuk GTX 1050 Ti.


Kedua graphic card terbaru NVIDIA dari lini GTX 1050 Series tersebut nobatkan sebagai graphic card pilihan untuk gamer dan pengguna PC dengan budget terbatas, namun menginginkan performa memadai tanpa perlu banyak melakukan upgrade pada komponen PC. Hal tersebut terwujud berkat tawaran processing power tinggi dan juga rating konsumsi daya yang rendah di angka 75 Watt. 

GeForce GTX 1050 Series

Kedua graphic card dari lini GeForce GTX 1050 Series ini sama-sama mengusung GPU Pascal GP107 yang merupakan chip GPU baru dari lini arsitektur NVIDIA Pascal. Namun GP107 pada GTX 1050 (non-Ti) mengalami sedikit pemangkasan. GPU GP107 kini hadir dengan proses fabrikasi 14 nm atau lebih kecil dibandingkan GPU Pascal lainnya dengan 16 nm
GeForce GTX 1050 Ti sendiri datang dengan 768 CUDA Core dan beroperasi dengan Base Clock di angka 1290 MHz dan Boost clock hingga 1392 MHz. Chip GPU juga akan didampingi oleh memori GDDR5berkecepatan 7000 MHz dengan kapasitas 4096 MB dan antarmuka 128-Bit. Menariknya, GeForce GTX 1050 Ti memiliki nilai graphics card power hanya sebesar 75 Watt dan dapat beroperasi normal dengan power supply 300 Watt.

Sedangkan GeForce GTX 1050 (non Ti)  sendiri datang dengan 640 CUDA Core dan beroperasi dengan Base Clock di angka 1345 MHz dan Boost clock hingga 1455 MHz. Sama dengan varian Ti-nya, GPU GP107 akan didampingi oleh memori GDDR5 berkecepatan 7000 MHz dengan antarmuka 128-Bit. Namun, sedikit berbeda dengan memori yang diusung oleh GTX 1050 Ti, GTX 1050 hanya mengusung memori sebesar 2048 MB. GeForce GTX 1050 memiliki nilai graphics card power hanya sebesar 75 Wattdan dapat beroperasi normal dengan power supply 300 Watt.

Berbasiskan arsitektur Pascal, tentunya lini GeForce GTX 1050 dengan fitur-fitur menarik dari Pascal seperti, ANSEL, teknologi memori kompresi yang lebih baik dan tentunya menawarkan teknologi Simultaneous Multi-Projection. Sedikit berbeda dengan GPU berarsitektur Pascal sebelumnya, arsitektur Pascal pada GP107 yang digunakan pada lini GTX 1050 ini tidak menggunakan fabrikasi Finfet 16nm, melainkan Finfet 14 nm.

Saturday, September 1, 2018

Cara Menginstal dan Menguninstal Aplikasi


Cara Instal dan Uninstal Program/Aplikasi di Laptop Termudah Tercepat

Adalah Hal yang sering dilakukan dan merupakan sebuah pengetahuan yang mendasar yang harus di ketahui oleh pemilik laptop yang mungkin masih awam dan sebelumnya belum mengetahui bagaimana caranya. Setiap komputer yang baru dibeli sebenarnya masih dalam keadaan kosong, tidak berfungsi sama sekali hingga akhirnya di instal berbagai program yang mempunyai fungsi sendiri-sendiri maka saat itulah laptop sudah bisa di gunakan. bisa bersuara dan bisa merespon.

Lalu.. bagaimana cara menginstal program di laptop/ pc apakah itu sulit ataukah mudah, Ternyata menginstal program ke komputer itu mudah sekali waktu yang di butuhkan hanya beberapa menit saja bahkan kurang. Menginstal disini berarti menambahkan program ke dalam laptop sedangkan kebalikannya adalah uninstal atau menghapus program dari laptop. cara ini biasanya dilakukan ketika program sudah tidak digunakan oleh pemiliknya. Untuk itu.. pertama kali kita akan membahas bagaimana cara menginstal program ke dalam komputer terlebih dahulu.

Apa yang perlu di persiapkan ketika ingin install aplikasi ke laptop

Ya, tentu saja file installer nya harus di persiapkan terlebih dahulu, jika dalam hal ini kita membahas tentang aplikasi windows, sobat bisa mendownload software secara gratis yang ada di internet melalui situs-situs besar di internet selengkapnya bisa sobat lihat di bawah ini. disana sobat bisa menemukan program-penting yang direkomendasikan untuk menunjang performa laptop seperti program untuk mengedit foto, aplikasi untuk mengedit video, mengedit audio lagu mp3, merubah format video, mendownload video di internet, aplikasi untuk mengakses internet, aplikasi untuk memutar video/ audio, aplikasi game, aplikasi anti virus, aplikasi driver dan lain sebagainya.

Link artikel yang berkaitan :
Cara Mengubah Format Video Menjadi Format Apa Saja Sesuai keinginan
Cara Membuat Video Slideshow dari Foto dengan Musik Hanya Dalam 5 Menit
11 Software / Aplikasi Edit Video PC 100% Gratis Terpopuler
Aplikasi / Software Edit Foto Terbaik Terbaru Gratis Dan Berbayar
Puluhan Aplikasi Laptop / PC Terbaru yg Buat Windows Makin Keren
11 Situs Download Software Dan Aplikasi Gratis Terbaru
13 Anti Virus Terbaru Terbaik Dunia Versi Gratis / Berbayar
9 Software Pemotong Pengedit Lagu Gratis Terbaik Berkualitas
6 Software / Aplikasi Pemutar Video PC terbaik Dan Gratis

Cara Instal aplikasi ke laptop dengan Cepat mudah

Bagaimana cara instal aplikasi di komputer ? Jika sobat sudah mendapatkan program yang sobat inginkan berikutnya adalah menerapkan installer tersebut ke dalam program komputer. caranya tinggal buka installer tesebut dan ikuti saja proses instalasinya sampai selesai. sebagai sampel sobat bisa mencoba menginstal program aplikasi facebook namanya adalah messenger untuk laptop / PC silahkan download aplikasinya lewat tautan di sini. jangan lupa pilih windows. download sampai selesai. jika sudah silahkan ikuti langkah-langkah berikut ini.

1.Buka file installer yang sobat sudah sobat dapatkan
2.Buka file installer yang biasanya program aplikasi windows ini berupa file berextensi .exe misalkan file di bawah ini adalah messengersetup.exe, untuk menginstal ke dalam laptop silahkan klik 2 kali program tersebut.
3.Klik "yes" untuk konfirmasi
4.Klik "instal" untuk meneruskan proses
5.Tunggu proses penginstalan program
6.Klik "finish" dan silahkan jika sobat ingin langsung membuka program ketika proses penginstalan sudah selesai silahkan biarkan tercentang pada baian "start messenger" atau jika tidak hilangkan centangnya
7.Selesai dan buka programnya

Cara Uninstal / Remove program windows 7

Caranya sangatlah beragam namun cara yang paling sering di lakukan adalah dengan menggunakan fitur remove program yang sudah tersedia di windows. cara ini bisa di lakukan di semua windows baik itu windows XP, windows 7, 8 dan 10. Untuk mengetahui nama program yang akan sobat hapus / uninstal sobat bisa melihat program icon terlebih dahulu lewat dekstop selaknjutnya sobat bisa menginstal programnya. berikut adalah cara lengkap uninstal program paling mudah dan paling cepat.

1.Jika disini saya contohkan ingin menghapus dan menghilangkan program messenger
2.Klik pada "start" di bagian pojok kiri bawah
3.Pilih "Uninstal program"
4.Pilih nama program yang sobat inginkan. misalkan saja messenger. klik pada icon tersebut dan ikuti proses nya sampai selesai.

Cara Menghapus Remove program dari Komputer

Adakah cara lain selain cara di atas. ? cara ini bisa sobat lakukan jika cara di atas gagal sobat lakukan. Untuk menghapus program ada banyak cara namun yang paling sering di lakukan oleh pengguna PC adalah melalui fitur control panel yang ada di windows dan melalui aplikasi remove program / uninstall program yang sudah ada di dalam file installer itu sendiri. Jika di atas sudah di bahas menghapus program lewat control panel sekarang sobat bisa melakukan dengan cara lain yaitu lewat file yang ada di dalam directory / folder program itu sendiri. berikut selengkapnya.
1.Klik kanan pada icon program di dekstop lalu pilih "properties"
2.Klik "open file location"
3.JIka disana ada file uninstall silahkan klik 2 kali program tersebut
4.Program sudah selesai di hilangkan dari komputer dengan cepat.

Semoga bisa memberikan manfaat dan menambah wawasan..

Friday, June 29, 2018

How to install Printer to Laptop or Notebook

You are still confused with the printer installation step in love by the manufacturer, do not panic


I will give you the way.

Install printer in general


How to install printer on the computer is actually easy. The first step you should do is to place the printer close to your PC or notebook. Make sure the distance is close enough for the printer power cable to connect to the PC without needing to be pulled. Then, enable the printer by using a USB cable connection and install the driver CD that is normally included on the printer at purchase. Once installed perfectly, check again to make sure everything is installed correctly, by opening the device and printers in the control panel menu.

Install using the driver CD


To install the printer to a computer or notebook using a driver CD, you must prepare a driver CD that matches your printer brand and then insert it into your computer's ROM drive. Once you've made it to the installation page, follow all the instructions easily. Remove the driver CD after the printer is installed perfectly, and can check it in printers and faxes on the control panel menu. If the printer driver CD problematic, install a new driver CD or visit the printer manufacturer's service website. 

Install without using the driver CD


If the driver CD is lost or problematic, then you should follow some of these tips. First, open the control panel menu and go to devices and printers. Then, click add a printer and click next to the printer port option. Use the recommended ports to set the best options.

Secondly, try checking the official printer brand website you bought, then looking for a link to download the software. Already many computer manufacturers that provide software and driver CD on the site to be downloaded for free, really. If the driver CD has been downloaded, you just need to install the printer again.

Good luck and If eror look back what is lacking.

Wednesday, June 27, 2018

How to Install Windows 10 Complete


Tutorial that I will share this time on how to install (reset) windows 10. As you know that windows 10, Microsoft's operating system is inviting special attention for computer users.

Many of them are upgrading from their old operating system to windows 10. It is perfectly natural, considering the interface of windows 10 is very elegant and cool.

Display windows 10 is a blend of windows 7 and windows 8. You need to know also, how to install it is almost similar to how to install windows 8. My advice, read the tutorial well until it runs out later there will be no problem when the installation process of windows 10 .

Before installing windows 10 operating system, there are some things you need to consider, including as follows:
  • Prepare DVD installer windows 10 his first well, because this tutorial using DVD for installation media. 
  • To boot first from DVD, please first set boot device priority in BIOS menu.
  • If the installed laptop, plug the charger immediately, do not let the battery runs out time to install.
  • As usual, prepare some snacks or can also listen to music, because the installation process of windows 10 long enough. Installation process for about half an hour and half hour was very long for me, hehehe install casual only while nibbling.
How to setup BIOS to boot from DVD?

As I've said before, you'll need BIOS settings to boot the first time from DVD. Because the default computer / laptop boot first from HDD, then you should replace it in the following way:

1. Turn on or restart your computer / laptop. After that, press the DEL (Delete) button repeatedly until the BIOS display as shown below. Oh yah, not all computers / laptops use the DEL key to enter the BIOS menu, there are some of the most commonly used buttons like F1, F2, or Fn + F2 depending on the manufacturer. Next move to Boot tab using ◄ ► button.

2. As you can see that Hard Drive or HDD is at the top. This indicates that the first boot is done from the HDD.

3. For booting the first time from DVD, please select CD-ROM Drive then slide using + / - button to be in the top position as shown in the following figure.

4. Do not forget to insert the DVD installer windows 10 into DVDROM, then save the results of your BIOS settings earlier by pressing the F10 key, then select Yes.

Steps to install windows 10

Once you have BIOS settings to boot the first time from DVD, it's time you do the installation of windows 10. Check out the following steps to install windows 10:

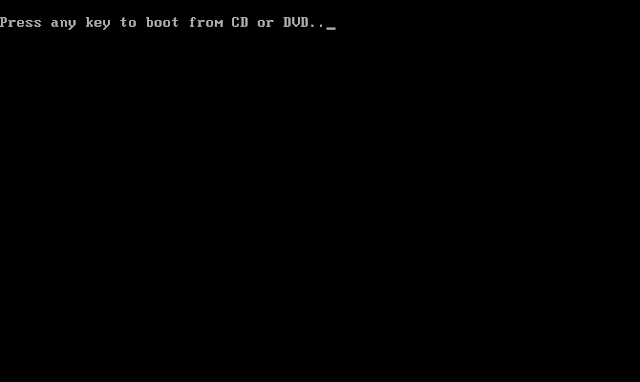
1. Press any key to start windows installation 10. Suppose you are confronted with a display like this in the middle of the installation process, do not press any button yes, as you will be taken back to the initial installation process if doing so.

2. Select Indonesian (Indonesia) in Time and currency format, for others such as Language to install and Keyboard or input method leave default, no need to be replaced.

3. Next select Install now.

4. Then tick I accept the license terms, then select Next to continue.

5. In the following steps, please select Custom: Install Windows only (advanced).

6. Suppose you want to re-install and upgrade / downgrade from your old windows operating system to windows 10, just delete Drive 0 Partition 2 (C: partition :) and Drive 0 Partition 1: System Reserved, later automatically, both partitions you delete it to Unallocated Space (unpartitioned).

Well, next please create a new partition again and make Drive 0 Partition 2 as the location of the installation, then select Next to continue. That way, the data on other partitions remain secure (not deleted). More details, see the following gif images (If you use your phone while reading this tutorial, make sure you use Chrome or Mozilla browser to move the gif image perfectly):

7. As you can see in the following picture that the HDD space is still empty (Unallocated Space). For that, you have to partition it. For the number of partitions, can be 2 or more, as you wish.

8. Please select Drive 0 Unallocated Space> New, specify the size of the partition, then select Apply. The size is not too much and not too little too. Suppose your HDD size is 320GB / 500GB, give 100GB size is enough, because the first partition you created this is a system partition (C partition :). 

9. Select OK to create the system reserved partition.

10. Please create 1 or more partitions in the same way as in step 8.

11. As you can see in the following picture, I just created 2 main partitions. Next select Drive 0 Partition 2 for the installation location (do not place it on another partition yes), then select Next.

12. Installation process is running. This process takes about 30 minutes, just wait while eating chips. Oh yes, later your computer / laptop will restart itself repeatedly, so do not worry, because it is part of the installation process of windows 10.

13. Please enter your product key windows 10, then Next. If you do not have one, please select Do this later. You can activate your windows 10 later.

14. Next select Use Express settings.

15. Select I own it.

16. On this page you are asked to login your microsoft account. You can do it later, so choose Skip this step.

17. Please enter your computer name and password if necessary (it would be nice to give a password so not just anyone can access your computer / laptop). Fill in a word or phrase that helps you remember your password in the Password hint field.

18. This process does not take much time, just wait a while until you are taken to your desktop.

19. And taddaaah, installation of windows 10 succeed! Here's the desktop display on windows 10 is cool and interesting.

Well, hopefully you managed to install windows 10.

Tuesday, June 26, 2018

Easy Ways to Install Windows 8 / 8.1 Complete With Images Each Step


On this occasion, I will share a tutorial on how to install windows 8 / 8.1 easily, even for the layman too. Step by step I also explain in as much detail as possible so that you can understand exactly every step. But even so, make sure you listen to every step, do not let something you pass.

Between windows 8 and 8.1 is not much different. There may be slight differences between the two, such as navigation properties, search features, and tile sizes that have their own characteristics.

One of the most prominent features of windows 8.1 is, there is a start button on the taskbar menu, where windows 8 is not equipped with this feature. But still, the installation process is not much different, so you do not have to worry. Check out the following windows 8 installation steps:

Before starting install windows 8

  • As usual, prepare the DVD installer windowsnya. Suppose you want to install windows 8 with flash 
  • If the installed is a laptop, I strongly recommend that you plug in your laptop charger right now. Very risky when in the installation process or still halfway the installation process, uh suddenly the laptop died.

Setting BIOS to boot from CD / DVD

First of all you need BIOS settings to boot first from CD / DVD. When the PC or laptop was first turned on, the first booting is done from the HDD, so you must first setup it in the following way:

1. Turn on / restart your computer or laptop, then press DEL (Delete). To enter the BIOS menu, not all computers / laptops use the same keys.

 "Other buttons that you can use include F1, F2, Fn + F2, and so forth, try one."

2. The BIOS menu display will appear as shown below. Remember, well, the BIOS menu display on every computer / laptop is not all the same. After that, move to the Boot tab using the ◄ ► button.

3. As shown in the picture below, the position of Hard Drive or HDD is located on its own, it means the first boot is done from the HDD. Therefore, you must change it to boot the first time from CD-ROM Drive.

4. Select the CD-ROM Drive, then use the +/- button to move it to the top position as shown in the picture below.

5. Do not forget yes, insert DVD installer windows 8 into the DVDROM your computer / laptop. Save the configuration you have done by pressing the F10 key.

As I've said before, not every type of BIOS on each laptop is the same. So do not be surprised if the BIOS display used in this tutorial is different from the BIOS display on your laptop / computer. For more details about BIOS understanding and its types, you can read an article about the BIOS I've previously shared.

Steps to install windows 8

The steps to install windows 8 is also not much different from installing windows 10, although there are differences, and even then only a little. Well, consider carefully the steps as follows:

1. To start the installation, please press any key to make PC or laptop boot from CD / DVD. Oh yes, suppose you meet again with a display like this in the middle of the installation process, do not press any button, then you will repeat the installation process from scratch.


2. Select Indonesian (Indonesia) in Time and currency format. For others just leave the default, no need to change. After that select Next.


3. Will appear as shown in the picture below. Please select Install now.


4. The next step is to enter the product key windows 8, which is usually contained in one package the same DVD. Then select Next.


5. Do not forget to tick I accept the license terms, then select Next to proceed to the next step.


6. In this step, select Custom: Install Windows only (advanced).


7. For those of you who want to re-install, where your computer / laptop has ever installed windows operating system before and want to data on other partisi not lost, just delete Drive 0 Partition 2 (partition C :) and Drive 0 Partition 1: System Reserved , then create a new partition again. After that select Drive 0 Partition 2 as the installation location, then select Next. More details, see the following gif images.

Note: For those of you who want to re-install windows 8, skip step 8-12 and for those of you who have never installed the operating system at all, or the HDD is still empty and smooth, please skip this step number 7.


8. As you can see in the picture below, that space HDD is still empty. What you need to do in the following step is to partition your HDD into multiple partitions (depending on your wishes, it can be 2.3 or more partitions).


9. To create a new partition, please select Drive options (advanced)> New, specify the size of the partition according to taste, then choose Apply. If your HDD is 320/500 GB, I recommend giving 100GB size because the following partition is a system partition (C partition :).


10. Next select OK for making system reserved partition.


11. Create a new partition again according to your taste. For the steps exactly the same as in step number 9 that is select Disk 0 Unallocated Space> New, then specify the size of the partition, then select Apply.


12. Select Drive 0 Partition 2 (partition C :) as the location of its windows 8 installation, then select Next.


13. At this step takes approximately 15 minutes and your computer / laptop will restart several times during the process. So do not worry because it is part of the installation phase.

14. Next name it on your PC, then select Next. In the following stages, you can also set the theme color to your taste.

15. Next select Use express settings.

16. After that select Create a local account.

17. Enter the username and password when necessary. No password is no problem, but if you want to not be arbitrary people can access your computer / laptop, it is advisable to give him a password.

For the Password hint field, enter a word or phrase that allows you to remember your password. Next select Finish.

18. Wait a few minutes, after which you will be taken to your desktop.

19. Done! You have successfully installed windows 8 or 8.1. The following display Desktop and Start Menu on windows 8.

Of course there are some things you should do after successfully installing windows operating system 8. Please visit the link below to find out what things you need to do after installing windows 8 / 8.1.

Monday, June 25, 2018

How to Install Windows 7


Installing Windows may sound like a daunting task but it is actually very easy, especially if we install newer operating systems such as Windows 7 Ultimate 32-bit and 64-bit. But no need to bring a computer or Laptop to a local expert to reinstall a simple one. We can install Windows alone! 

Windows 7 is the most easily installed Windows operating system. We are only asked a few important questions during installation, most of the preparation process is completely automated. Like other Windows versions, the "clean install" or "advanced" method is the smartest way to reinstall Windows 7 compared to less commonly installed "upgrades" or parallel installs.

How To Install Windows 7?

To start the installation process of windows 7 on the computer or laptop, we must set the initial boot in the BIOS Menu for the first PC to read DVD Windows 7 or Flashdisk.

How to Install Windows 7

To install windows 7, follow the steps below:
1.Turn on PC (Computer or Laptop), then go to Menu BIOS.

nyalakan laptop

Tips: In order to get into BIOS MENU, WHEN turn on the Laptop or Computer like the picture above, press continuously quickly F2 key, on some other brand laptop press Esc, F1, F10 or Del On Computer.

Note: On some brands of laptops may also while pressing the "fn" along with F1 / F2 etc, for the button to work.

2.Go to BIOS Menu. In the BIOS MENU set up the first boot.

menu bios

Note: The picture above is an example of entry into the menu "BIOS" or "Setup Utility", this display varies depending on the brand.

3.Arrange Initial Boot. Locate the Boot Tab Menu to set the First Boot.

bios setup

Tips: Point First Boot So CD-DVD or Flashdisk as you wish, This display also varies depending on the brand. Change "Boot" first on Menu "BIOS" To CD / DVD or Flashdisk, but if from Flashdisk change first boot to Flashdisk, it is necessary for "Booting" first read media CD / DVD Windows 7 or Flashdisk.

 Note: Especially for the first boot of the flash, it must first input flash before turning on the computer or laptop.

4.Save BIOS Settings. Click Exit and then Exit Saving Changes by clicking Yes.

save setup configuration

Tips: Computer or Laptop will immediately "Restart" from DVD. Do not Forget first input DVD Windows 7 "Installer" to DVD Drive, before "restart".

5.Start Booting First. The PC will start booting from the Windows 7 Installer DVD.

press any-key

Tips: Click Anything on the keyboard, for example click "Enter" and time is only 5 seconds, if 5 seconds ga in click, process will not happen, must "restart" again.

6.Wait for the process. In This step does nothing.

loading installation

7.Select a language. Choose Bahasa English, then Click Next.

setelan bahasa

8.Start Install Process. Click Install Now to start the installation.

install now

9.Confirm Approval. Click I accept the license terms, then Click Next. Tips: Click for Approval installation.

persetujuan

10.Select advanced options. Choose advanced or advanced options for installing windows 7 system files.

advanced install

Tips: In this Step, very important, Click "Custom advanced". This step means to install Windows 7 from scratch, so it will be like new, and delete all the old system.

11.Set the partition. Arrange the partitions as desired.


Tips: In this step Important To Set Partition to be installed new Windows 7. The picture above is an example of a Laptop that has 3 Partitions, First System Reserved, Both old Windows 7 alias (C :), and Third Data alias (D :).

Note: If the above picture on the box is empty, it means the hard disk is not readable, then the hard drive may be damaged or not good or the cable to the hard disk is not good or undetected.

12.Delete Old System Partition. Delete the previous Windows System Partition.


Note: With Delete Partition, the Old system (C :) will be deleted, and My Documents will be deleted entirely, because My Documents is included (C :). So kalo save Data later in data should di (D :) or (E :). Point the cursor to delete Partition by Click "Delete", then click OK - OK aja, until display in next picture.

13.Create a new Partition. Create a new partition with enough hard disk space or space.


Tip: Point Cursor on the partition that will be filled with new Windows 7, Click New. Then Click OK and OK. To note, here there is a value of how "Byte Hard Disk".

14.Install windows 7 on the new partition. Continue installation on New Partition.


Tips: Display will be like the picture above, then point Cursor On Partition to be installed new Windows 7 "Primary", Then Click "Next".

15.Wait for windows file transfer process 7. Start the Installation Process.

installing windows

Tips: Installation Process It really starts, if it is up to this step you can really relax, because the next will run Automatic. Do not click anything, just leave it to restart by itself. If At Expanding Windows files there is "error", it means laptop memory / computer is broken, try to repeat again from the beginning if "error". If current, Windows will restart automatically.

16.Wait for the advanced process. The installation process continues automatically, then it will restart itself.

auto-restart

Note: If using DVD does not do anything, but if using Flashdisk after the image is "restart" Flashdisk MUST be revoked.

17.Automatic restart.

press any-key

Note: After "Restart", in this step do not click anything, if clicked it will start again like step above. If you wear the flash no picture above, right dah revoked.

18.Let the process continue. Leave it alone do not click anything on this step.
updating registry settings

19.Advanced installation improvements. Leave it alone.


completing installation

Tips: Refining Windows Installation Process. Leave it alone, do not click anything, if gerakin "mouse" or drinking coffee.

20.Do not click on anything. The Windows Installation process is almost complete, and will restart automatically.
continue after-restart

21.Fill in the Data. Isiliah by creating a username.


user name

Tips: Fill in a Name for Laptop, Computer, free, then Click "Next".

22.Fill in the password if desired. Fill in Password to login to windows 7.

set password

Tips: No need to fill in, except Laptop or computer will use "password" or keyword, then click "Next".

23.Fill in the Product Key if it already has. Product key windows 7, click Skip if you have not already.

product key

Tip: If you already have a Windows 7 Code, type the code in the box provided, and click "Automatically activate Windows". If you do not already have the code, do not fill anything, Next "Next" will be "Skip", so Click "Skip".

24.Choose a recommendation setting. Click Use recommended settings.

recommended setting

25.Set the time. Setting the current time, adjust the time you want, then click Next.

pengaturan waktu


26.Done. Windows 7 installation process is complete.


desktop

Tips: For those who have not entered the code windowsnya "Product key" alias not activated, then perfect windows 7 is valid only 3 or 30 days depending on the edition, if not activated, windows display will turn black, and if left sometimes can damage hardware Laptop or Netbook, you should immediately activate Windows after Installation is complete. To activate (activation) windows 7 is actually on the DVD itself, if confused ask the seller or ask the more know, because the way windows 7 activation is different.

Every windows 7 installation should install windows-drivers such as Graphics, Audio, Network, and all related drivers in their brand, usually CDs / DVDs are given when buying a Laptop or Computer, if there is no download. But On some Laptop Brands, usually do not need also because it is integrated with Windows 7, and Driver must be installed so that Laptop or Computer running with as much as possible, then complete with supporting software.